You spot it on vintage saucepans, door knockers and old lanterns: that dull brown-green film that creeps in quietly and then makes itself at home. People search for “miracle polish” and end up with something sharp-smelling that burns your nose, wipes away the character and leaves smeary streaks behind. Makers, on the other hand, tend to reach for something that looks almost like it belongs in the kitchen. A bowl, a wooden spoon, and three cupboard staples. No fumes, no fuss-just a steady little ritual that lifts murk into a warm glow, as if you’ve brought the whole room back to life.
The quiet artisan paste hiding in plain sight
The recipe is almost embarrassingly simple: white vinegar for the bite, fine salt to speed things up, and plain flour to thicken it into a paste that stays put. Work it over oxidised copper and the surface shifts tone surprisingly fast. The brown slackens, the green haze shrinks, and the metal underneath warms from russet to that peach-gold shine only copper seems to manage. It’s mild enough for decorative pieces, brisk enough for the backs of cookware, and inexpensive enough that you don’t need to “save it” for special occasions. The secret isn’t that the ingredients are exotic. It’s that, together, they stay in contact long enough to do proper work.
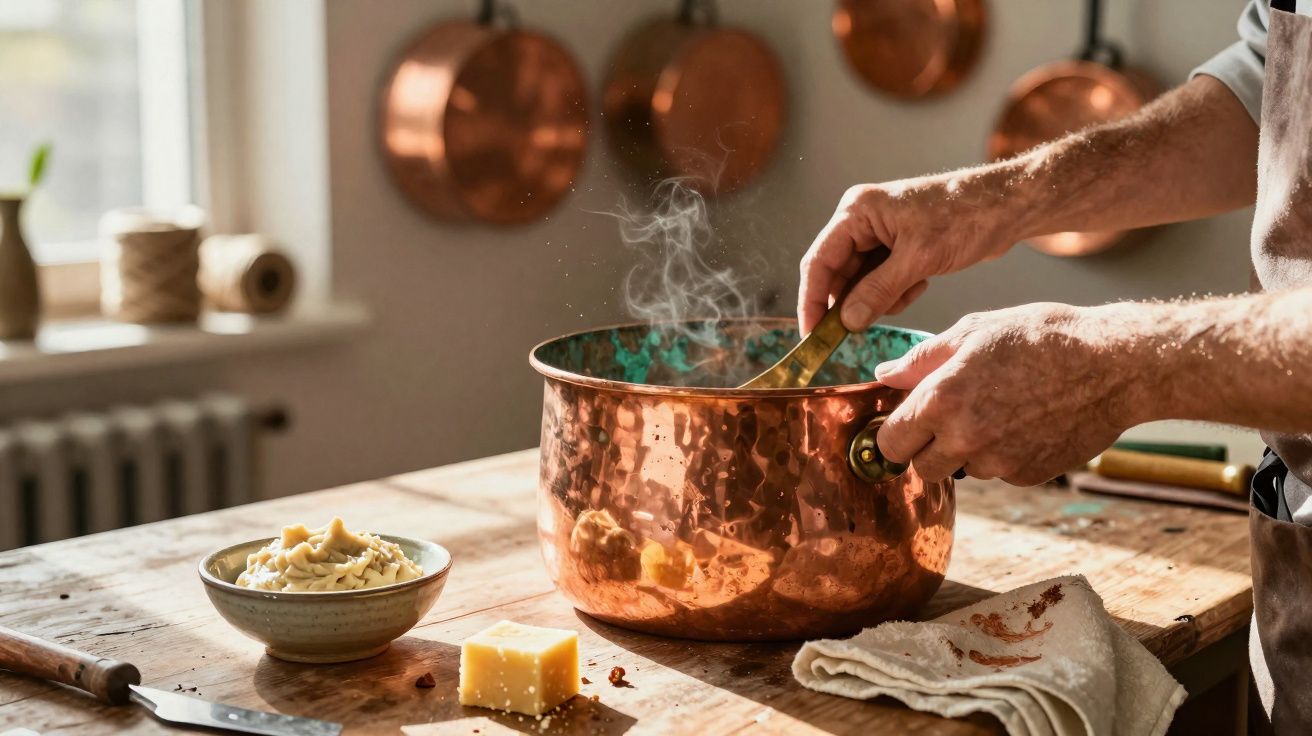
I first saw it done at a Saturday morning market-the sort that smells of fresh bread and rain on paving stones. A coppersmith put a dented pot on a cloth, dropped on a pinch of salt, then poured white vinegar in slow circles. He stirred in flour until it turned into a loose paste, the colour of cream mixed with rainwater. No patter, no hard sell-just calm, circular strokes with a cotton rag. Within minutes, the copper broke through the tarnish like sunrise through fog. He rinsed, buffed, and carried on as if it were the most ordinary thing in the world. It wasn’t a trick.
Not long after, I watched a retired chef in Bath revive a flea-market sauté pan with the same bowl-and-spoon routine. Three teaspoons of salt, half a teacup of vinegar, then flour until it moved like single cream. He spread on a thin coat, let it sit while the kettle came to the boil, and then worked the paste with a soft cloth. By the time the kettle clicked off, the outside had come clean. Rinse, a shake, a low flame on the hob to dry, and a quick buff with an old tea towel. Ten minutes at most. He didn’t beam-he simply nodded, like someone who learned this back when apprenticeships came with coal dust.
There’s straightforward chemistry behind the transformation. Vinegar’s acetic acid loosens copper oxides and baked-on grime, converting them into residue you can rinse away with water. Salt contributes chloride ions that encourage the acid to work faster on stubborn areas. Flour isn’t a cleaner; it’s a thickener that keeps the mixture in place so the acid can stay in contact, and it adds the lightest micro-abrasion-enough to lift, not enough to scratch. You’re not blasting the surface. You’re softening, converting, then gently escorting the dirt off the metal. That’s why the finish looks warmer and less “shaved” than some aggressive metal polishes. It’s not just clean-it’s unhurried.
Mix, apply, protect: the way copper makers actually do it
Start with a small bowl:
- Add 3–4 teaspoons of fine salt
- Pour in 120–150 ml of white vinegar
- Whisk in plain flour until you have a pourable paste, roughly like pancake batter
Set the copper on a towel. If there’s greasy residue, wash first with a drop of washing-up liquid and rinse. Spread the paste with a soft cloth or sponge and leave it to work for 5–10 minutes. If it starts to dry, moisten it with a little more vinegar. Rub in gentle circles, topping up with fresh paste where needed, then rinse under warm water.
To stop lingering acid causing streaks or uneven re-tarnishing, neutralise with a quick wipe of bicarbonate of soda mixed with water, then rinse again and dry thoroughly.
A note on workflow that helps if you’re doing several items: polish, rinse and dry one piece at a time rather than leaving paste to sit while you move on. Copper reacts quickly, and a paste that dries on can lead to patchy marks that take longer to even out.
Where to be careful (so a calm clean doesn’t turn into regret)
Don’t mistake “gentle” for “use anywhere”. If the copper is lacquered, the paste won’t reach the tarnish at all-you’d need to remove the lacquer first. And if you’re dealing with tin-lined interiors, keep the paste strictly on the outside: clean the cooking surface with mild soap and water only, then rinse well and dry to prevent water marks.
If you’re unsure, try a small test area-under a handle is ideal. Avoid steel wool: it scratches the grain, and those cuts can make future tarnish bite harder. Most people don’t do this weekly, and it doesn’t need to become a chore. Think in terms of a seasonal refresh, then keep the finish going with the lightest protective coat.
Heat, beeswax, and a longer-lasting glow
Professionals often add two finishing steps. First, a little warmth helps: place the cleaned piece on a very low hob or in a warm oven for about a minute, then buff while it’s just warm to the touch. Second, apply a whisper-thin layer of beeswax to slow fingerprints and moisture from dulling the shine.
One fingertip of wax, spread as if you were applying hand cream, can extend the time between polishes by months. Wash your hands afterwards, label the jar clearly, and keep it away from food.
One coppersmith summed it up like this:
“I mix it thin enough to run, thick enough to stay. If it smells like a chippy, it’s perfect.”
Key working notes:
- Ratio: about 1 part salt, 4 parts vinegar, flour until it coats a spoon
- Contact time: 5–10 minutes; re-wet with vinegar if it skins over
- Do not use: on lacquered copper, or inside tin-lined pans
- Finish: warm briefly, buff, then spread a pea-sized amount of beeswax over the whole piece
Shine as a habit, not a chore
The pleasure isn’t only the result-it’s the feeling of maintaining something built to last. Copper is one of those materials that records your touch and rewards it. Ten minutes, a bowl from the cupboard, and the room shifts. Edges look sharper, reflections come back, and at dusk you notice little halos of light on the wall again. Do it with someone else and you end up comparing ratios, laughing about the vinegar smell, and telling stories about the first proper pan you bought. The glow lasts longer when the method is simple, kind to the metal, and passed along like a kitchen secret.
If you want to slow tarnish between cleanings, storage makes a difference. Keep copper away from damp air (a cupboard is better than an open shelf above the kettle), and avoid leaving it in contact with salty residues-especially in coastal homes where the air itself carries more chloride. A quick wipe-down after handling, rather than a full polish, often does more to preserve the finish than frequent deep cleaning.
For truly valuable antiques-especially pieces where the patina is historically important-consider whether you want bright copper at all. A light clean to remove grime may be appropriate, but stripping back to a high shine can reduce the character collectors prize. When in doubt, test gently and stop early; you can always clean more, but you can’t put original patina back.
| Key point | Detail | Why it matters |
|---|---|---|
| Artisan paste recipe | 3–4 tsp fine salt + 120–150 ml white vinegar + flour to a loose paste | Simple, low-cost ingredients that work quickly without harsh fumes |
| Rinse and neutralise | Warm rinse, then a bicarbonate of soda wipe to neutralise leftover acid | Helps prevent streaks or future green bloom and keeps the patina looking natural |
| Seal the shine | Warm briefly and buff, then apply a thin beeswax film with a soft cloth | Months of resistance to fingerprints and a softer, richer glow |
FAQ
- Can this paste damage antique copper?
It’s mild, which is exactly why craftspeople favour it, but test under a handle first. If the piece has a valuable original patina, clean lightly and avoid vigorous rubbing.- Will lemon work instead of vinegar?
Yes. Lemon juice with salt cleans well, although it dries faster. Add a little flour or water so it clings, and keep the contact time short.- Why add flour if it doesn’t clean?
Flour thickens the acid so it stays on vertical surfaces, giving the chemistry time to lift oxides evenly without streaks or dry patches.- Is it safe for food-contact areas?
Use the paste on the outside only. For tin-lined interiors, wash with mild soap and water. Rinse thoroughly and dry to prevent water marks.- What about stubborn green spots?
Dab fresh paste directly onto the spot for a few minutes, re-wet with vinegar, then rinse. Marks that won’t shift may be etching-don’t over-rub the metal.


Comments
No comments yet. Be the first to comment!
Leave a Comment