It goes dull, pulls in shadows and drains the light from the whole bathroom. The good news is you don’t have to re-tile to bring it back - you just need to treat grout like fabric, not stone.
Just after seven, the sun caught the bathroom at an angle - the kind of sideways light that reveals everything. The tiles looked spotless, but a thin grey seam ran between them where the grout should have been bright. I’d already done the toothbrush-and-podcast routine the week before, yet it still looked tired. The shower screen gleamed; the grout looked sulky. I reached for another spray, caught that sharp chemical whiff, and briefly considered ripping the lot out - until a neighbour chuckled and said, “You’re cleaning the wrong thing.” They were right, and the fix was not what I expected.
Why your grout looks older than it is
Grout is porous, which means it soaks up steam, soap residue and the tiny minerals dissolved in water. Over time, it shows every bit of that build-up as uneven darkening and patchy colour. Under warm evening lighting you can miss it; under clear morning light, every line suddenly stands out. That’s why a bathroom can sparkle on the tile faces but still feel dingy around the edges: the surface is clean, but the colour in the joints has shifted.
It’s like a white shirt with a faint tea mark at the cuff - freshly washed, yet still not quite “fresh”. My friend Maya in Bristol once spent two solid hours scrubbing shower corners with bicarbonate of soda and a nail brush, the sort of cleaning that leaves your shoulders aching. The tiles ended up looking like a gallery wall. The grout, though, still resembled wet pavement in central London. She assumed it was grime. It was staining - a change in tint.
We read a room by contrast. Bright tiles next to grey grout signals “old” to the brain. White next to white reads “new”, even if nothing else has changed. Bleach can tackle mould spores and lift some surface marks, but it won’t magically restore pigment that’s been discoloured by months of shampoo, conditioner and hard water. The answer isn’t more elbow grease; it’s replacing the colour evenly and sealing the surface so it stays that way - like make-up with SPF, but for your bathroom.
The DIY secret: grout colourant and sealer (and why it works)
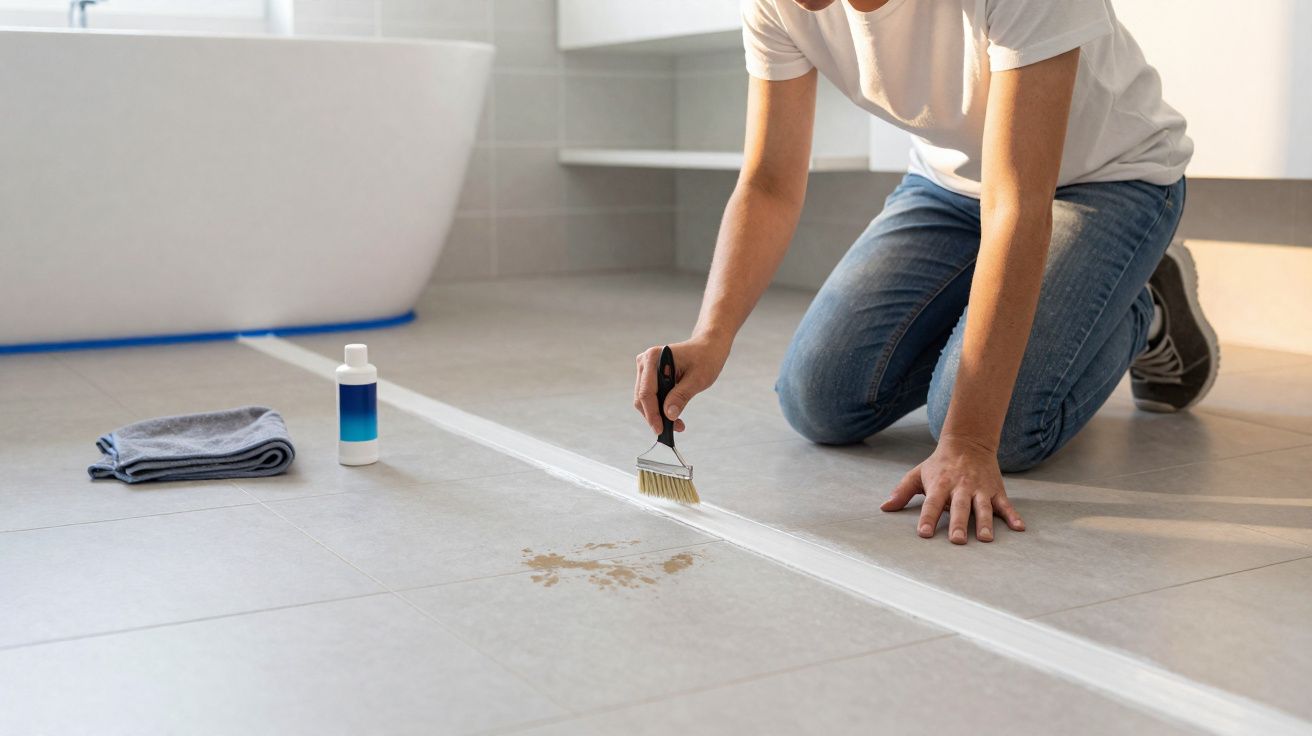
The game-changer is a grout colourant and sealer. This isn’t tile paint, and it’s not a flimsy pen that wears off in a fortnight. It’s a thin, pigment-rich liquid designed to soak into grout, even out the colour, and then create a protective barrier that helps block future staining. Once you’ve cleaned and dried the joints, you brush on the colour - most people choose crisp white or a soft, modern grey. It feels a bit like cheating, in the best possible way.
A quick, repeatable method
- Pre-clean the grout to remove soap film:
- Use an oxygen-based cleaner, or
- Make a hydrogen peroxide + baking soda paste and work it into the lines.
- Rinse thoroughly, then let it dry for around an hour with a window open (longer if the room is cool or humid).
- Mask off any messy silicone edges if needed; colourant won’t adhere properly to silicone.
- Shake the bottle well.
- Apply a thin coat with a small artist’s brush (or the built-in nib) along each grout line.
- Wait about 10 minutes, then wipe the extra colourant off the tile faces using a barely damp microfibre, wiping diagonally across the lines.
- Apply a second thin coat if you want that crisp, just-installed look.
Shade choice matters more than most people expect. Pure white delivers that rental-flat sparkle; a very pale grey looks more “designer” and is more forgiving day to day (because, honestly, none of us deep-clean grout every morning). If your tiles are textured, slow down and wipe sooner, otherwise the colourant can cling in the dips. Keep it off silicone joints, and always test a discreet corner first - every grout line absorbs slightly differently.
One small bottle can be the difference between “clean” and “new”. Because it includes a built-in sealer, it can also buy you months of easier maintenance. As a rough guide, £12–£20 typically covers a standard shower plus a splashback, with some left over. A steady hand helps, but perfection isn’t required: even with the odd wobble, the overall effect is dramatically brighter.
Avoid the common mistakes (and fix problems in the right order)
A few slip-ups can undo your hard work, but they’re easy to avoid:
- Don’t flood the grout lines. Thin coats bond better and look more even.
- Don’t let residue sit on the tiles. Wipe as you go rather than leaving it until the end.
- Deal with mould first. Use a mould remover, then rinse and allow the grout to dry completely. You want to colour clean grout, not seal a problem underneath.
- Repair crumbling or missing grout before recolouring. Patch and regrout damaged areas first, then colour and seal to blend everything together.
There’s a quiet satisfaction in watching the lines change as you work - like retouching a photo with a single pass. It’s fiddly in a calming way: brush, pause, wipe, repeat, and the whole room lifts.
Expert whispers and real-world tips for a smoother job
Work in manageable sections - about the size of a baking tray - so you can keep wiping tidy and stay relaxed. If you’re doing an entire bathroom, tackle the basin wall one evening and the shower at the weekend. Keep two cloths to hand: one dry microfibre and one damp, swapping them as they load up. If a smear dries on an unglazed tile, a white eraser sponge will often shift it.
Small kit, big difference:
- A 6 mm artist’s brush gives far better control in corners and around fittings.
- Painter’s tape helps if you’re nervous near stone edges.
- If grout widths vary, slow down on the wider lines and feather the edges so the colour looks natural.
- For wet areas, choose a product clearly labelled “stain-sealing” or suitable for wet rooms.
- If the bathroom runs cold and damp, warm the space for ten minutes with a small portable heater before you start - the grout needs to be properly dry, not just “dry to touch”.
New tip: once the job is finished, ventilation is what keeps it looking good. Run the extractor fan during showers and for 15–20 minutes afterwards, or crack a window if you can. Less lingering moisture means fewer stains and far less chance of mould returning along the edges.
Another helpful angle: colourant works best on cement-based grout. If your joints are epoxy grout (common in some newer installations), check the label carefully - some products won’t bond well. When in doubt, test a hidden patch and give it a full day to cure before committing to the whole room.
People often message afterwards with photos that say it all: same tiles, same lighting - but the bathroom suddenly looks brand new.
“I was convinced I needed a new shower. Turns out I needed new lines,” wrote Jess from Manchester. “Two coats, 90 minutes, and it looks like I paid a fitter.”
- Time: 60–120 minutes for a shower and splashback
- Cost: roughly £12–£20 per bottle of colourant
- Tools: small brush, two microfibres, mild cleaner, patience
- Result: even colour, sealed grout, brighter room
The small change that transforms how a room feels
Fresh grout is a bit like opening the curtains wider. Everything else seems to behave: the mirror looks clearer, towels appear fluffier, and even the soap somehow smells better. You start the day in a space that looks cared for, and that small signal has a way of nudging the rest of the day into place. It’s not about pretending the bathroom is new; it’s about restoring the crisp edges that make it feel loved.
There’s also a quiet pride in picking up this micro-skill. No toolbox, no trade, no mess - just noticing what’s actually wrong and choosing a solution that tackles it head-on. The “secret” isn’t spending big or ripping things out. It’s attention, applied precisely, and the visible lift that follows.
And once you’ve done it, you’ll spot grout everywhere: café floors, hotel showers, and the kitchen splashback you’ve been putting off. You start noticing how much lines shape the story of a room - clean tile, fresh grout, less visual noise - the kind of improvement you only fully appreciate when it’s missing.
| Key point | Detail | Benefit to you |
|---|---|---|
| - | Recolour and seal grout with a dedicated colourant | Makes tired lines look new without retiling |
| - | Pre-clean, dry well, apply thin coats, wipe as you go | A simple workflow that delivers professional-looking results |
| - | Choose the shade carefully and test a small area | Ensures a finish that suits your tiles and your routine |
FAQ
Will this cover mould?
Treat mould first with a mould remover, rinse, and let the grout dry fully. The colourant should go on clean grout and helps reduce future staining.How long does the finish last?
In a typical family bathroom, expect 12–24 months before a touch-up. In a guest shower, it can last much longer.Can I use it on coloured grout?
Yes. Choose a matching shade to refresh the existing look, or pick a contrasting shade for a change. Always test a discreet patch first.Is it safe around children and pets?
Work with a window open and keep the room off-limits until it’s dry. Once cured, the sealer is inert and wipe-clean.What if the grout is cracked or missing?
Regrout those sections first with a premixed grout. Once it has cured, recolour and seal to blend everything together.


Comments
No comments yet. Be the first to comment!
Leave a Comment