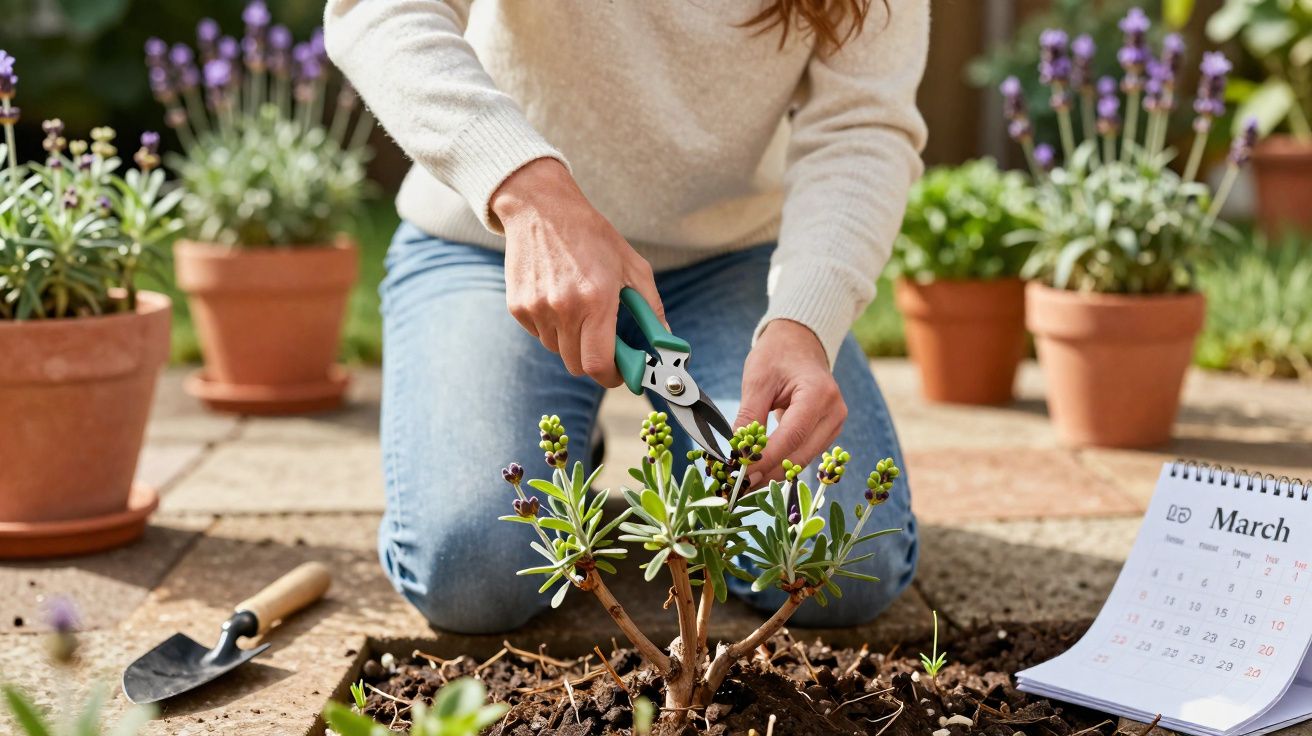
Your lavender has become leggy, grey at the base and, frankly, a little sorry for itself. March is the moment to pull it back into a tight, scented mound that flowers well again - and doesn’t end up looking like driftwood by July.
You notice it the second you lift a straggly stem with your secateurs, searching for green beneath that silvery top growth. Last summer’s flower spikes crumble easily, the centre can look oddly empty, and the base has that hard, woody look of a small shrub that has stopped bothering.
Then you glance at a neighbour’s lavender, clipped into a soft, rounded dome, and yours suddenly seems… neglected. A bee drifts past as if to pass judgement. Look closer, though, and you’ll often spot tiny buds low down on the stems - a quiet sign the plant can still respond if you cut in the right place.
Most of us have stared at a plant that looks beyond saving and wondered whether it would be kinder to start again. With lavender, it isn’t about luck; it’s about timing and where you put the cut. There’s a way back.
Reading a neglected lavender in early spring: find the green line
In March, you’re not trying to create a showpiece. You’re encouraging the plant to produce fresh growth from where it still can. The key is locating the green line - the point on each stem where soft, leafy growth ends and bare, brown wood begins.
Hold a stem up to the light and test it gently between your fingers. If it flexes and feels springy, it’s alive. If it snaps cleanly like dry chalk, it’s dead wood and needs removing. The goal is a compact plant: low, neat and rounded, with new shoots ready to accelerate as temperatures rise.
I once watched a friend bring back a lavender that looked like a bundle of brittle twigs. She worked steadily, taking roughly a third off the living growth and leaving a tidy cap of foliage. By June it was dense and humming with insects - and by July it still hadn’t stretched out into that familiar leggy shape.
What she didn’t do was a single dramatic chop. She pruned in two gentle stages: a shaping cut in March, followed by a quick trim after the first flush of flowers. That small summer reset is what stops late-season extension and slows the march towards woodiness.
Lavender is not generous about reshooting from old stems. It generally doesn’t break from old wood in the way rosemary sometimes can. Cut into leafless, brown sections and you may get nothing back. The safest March cut is just above the lowest fresh buds, usually 2–5 cm into green growth.
Remove last year’s flower stalks, open the centre a touch for air movement, and keep the outline rounded. Never cut into bare, brown wood. If a branch is dead right down to the base, take it out cleanly and move on.
Step-by-step: the March prune that resets bloom and stops woodiness in lavender
- Start clean and sharp. Use sharp, clean secateurs. Think “cushion” rather than “box” - a rounded dome always suits lavender.
- Take the live tips back. Work evenly around the plant, removing 2–5 cm from the living ends to form a smooth, rounded dome. Make each cut just above a pair of small leaves or visible buds.
- Clear the centre. Pull out or cut away any dead, grey stems to open the middle slightly and improve airflow.
- Chase growth down the stem (carefully). If a stem is alive near the base but bare in the middle, follow it down until you find healthy buds, then cut there. You’re directing energy into that lower, younger growth.
- Avoid the two classic mistakes. Either people barely trim at all (and it stays leggy), or they scalp it into old wood (and it sulks or dies back). The result you want sits in the middle: firm cuts into green, never into brown.
If your lavender is seriously neglected, renovate it over two springs. This March, reduce it by about a third into green growth only. After flowering, give it a light shear to maintain the dome. Next March, you can bring it down a little further, still staying above live buds.
Think like a bee and a barber: tidy shape, plenty of light and air, and no bald patches. Cut firmly, but cut kindly.
“Aim for green-on-green cuts in March, then shear lightly after the first flush. That two-step rhythm keeps lavender flowering and stops it getting leggy,” says a Sussex grower who’s been clipping lavenders for 20 years.
- Aim for a rounded dome of around 25–35 cm high for most English lavenders.
- Cut above live buds; if you’re uncertain, cut higher rather than lower.
- Remove dead wood completely to open the centre.
- Avoid fertiliser high in nitrogen; a light potash feed supports flowering.
- A gravel mulch keeps the base dry; bark can trap moisture against stems.
From March to July: rhythm, aftercare, and when to start again
Only water if the soil is genuinely dry and drains freely - lavender hates sitting wet. Sunshine and a bit of breeze will do more than any tonic. If yours is in a pot, use a gritty compost mix and empty any saucers that collect winter rain.
To hold the shape, shear lightly just after the first flush fades. Take off 2–3 cm from the spent stalks and the top growth. This simple cut is what prevents stems stretching, which is what makes plants look woody and bare at the base by mid-summer.
Small practical details make a big difference after pruning: disinfect sticky blades, especially if you’ve removed dieback, and try to prune ahead of a mild, bright spell so cuts dry quickly. If a hard frost is forecast, wait - fresh cuts are more vulnerable when temperatures drop sharply.
Another useful habit: don’t smother the crown with rich compost. Lavender prefers lean conditions. A surface layer of fine gravel is ideal because it reflects warmth, improves drainage and reduces damp around the stems. Think sun and air, not snacks and shade.
Some plants really are at the end of their useful life. If the centre is hollow, the base is splitting and all that remains is a ring of foliage, replace what won’t revive. Take heel cuttings from any healthy green shoots in March, pot them up, and you can have compact replacement plants ready for next year.
It also helps to accept the plant’s nature: lavender is relatively short-lived compared with yew or box. Many English types look their best for around five to eight years. That isn’t poor gardening - it’s normal behaviour for the plant.
March pruning is less about heroics and more about a repeatable rhythm: shape now, shear after the first flush, and keep the dome consistent. By July you won’t be battling woodiness - you’ll be guiding fresh growth towards another good display, with colour above and no “woody ankles” below.
Quick reference table: March lavender pruning essentials
| Key point | Detail | Why it matters |
|---|---|---|
| Timing | Shape in March; shear lightly after the first flush | Maximises flowering and prevents July woodiness |
| Where to cut | Always above live green buds; never cut into bare, brown wood | Lowers dieback risk and encourages fresh growth |
| Aftercare | Sun, drainage, gravel mulch, light potash only | Healthier plants, tighter mounds, longer lifespan |
FAQ
- Can I cut a very woody lavender hard in March?
Proceed cautiously. Reduce by about a third into green growth only and remove dead stems. Plan a second light shear after the first bloom rather than one brutal cut.- Will lavender regrow from old brown wood?
Usually not. English and hybrid lavenders rarely break from bare wood. Always cut just above live buds where the stem is still green.- Does the variety change how I prune?
Yes. English types (Lavandula angustifolia) suit a firm shape in March and a light summer shear. French/Spanish types (stoechas) prefer lighter, more frequent trims and need warmer, drier conditions.- Should I feed after pruning?
Skip high-nitrogen feeds. If you feed at all, a light potash sprinkle helps flowering. Overfeeding encourages soft, floppy growth that becomes woody more quickly.- What if my plant is past saving?
Take a few 8–10 cm cuttings from healthy tips in March and start again. Keep the parent plant tidy for one more season, then replace it when the new plants are established.


Comments
No comments yet. Be the first to comment!
Leave a Comment