Then a milky, cloudy film turns up and you can’t help but sigh - because it always seems to come back.
That haze is usually a mix of cooking fat and everyday dust. The good news: you can shift it quickly, protect your finishes, and slow down how fast it returns.
Why kitchen grease sticks in modern kitchens
In open-plan homes, vapours don’t stay by the hob. Warm air circulates, and as it cools, airborne fat settles onto cooler cupboard fronts - especially near handles and on upper doors. Add a little steam and a fine layer of dust, and you get a slightly sticky coating that traps even more grime day after day. Leave it long enough and it firms up, which means more scrubbing and a higher chance of damaging veneers, lacquer and brushed steel.
Act early, stay gentle, and let contact time do the heavy lifting. Elbow grease should be the last resort, not the plan.
Quick prevention that saves you from scrubbing later
Small, consistent habits shorten cleaning sessions and reduce wear on surfaces.
- After meals, wipe the “hot spots” with a damp microfibre: around the hob, by the kettle, on handles, and the cupboard row above the worktop.
- Put lids on pans that simmer and spit; use a splatter screen for searing and shallow frying.
- Cook under the hood: keep pans positioned towards the centre of the extractor’s pull.
- Ventilate: open a window slightly and run the extractor for 10 minutes after cooking.
- Clean hood filters monthly: hot water plus washing-up liquid, or the dishwasher if the manual allows it.
Two minutes with a warm microfibre now beats a 40-minute deep clean next month.
Natural solutions by material
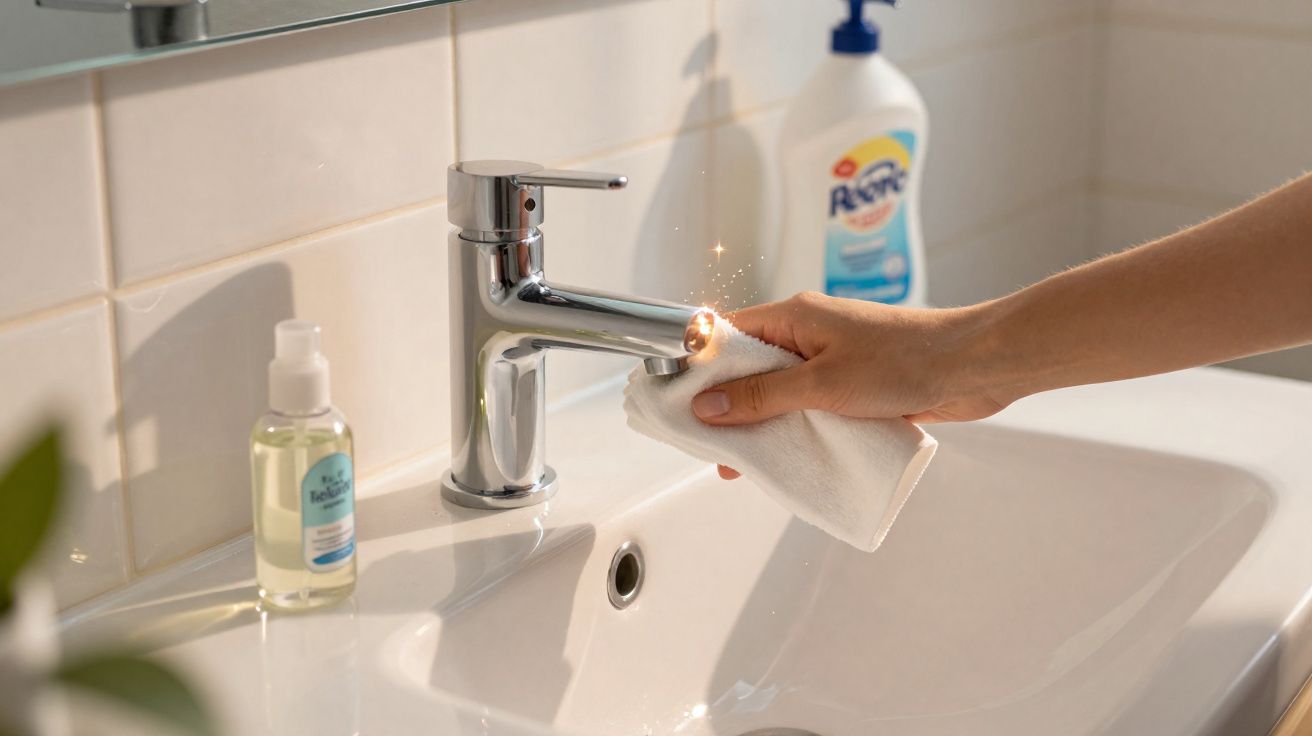
Stainless steel: shine without scratches
Aim: soften the grease, preserve the brushed grain, and leave an even finish. Avoid chlorinated cleaners and harsh powders - they can stain and pit stainless steel.
- First pass: use a soft cloth dampened with warm water and a small amount of washing-up liquid.
- Rinse and dry.
- Finish: mix 1 teaspoon of lemon juice with a few drops of olive oil, apply sparingly, wipe with the grain, then buff dry.
The acidity helps break down the film; the oil evens out tiny marks and reduces fingerprints.
For everyday upkeep, hot water plus a pea-sized amount of washing-up liquid is usually enough. Rinse and dry straight away to prevent limescale spots.
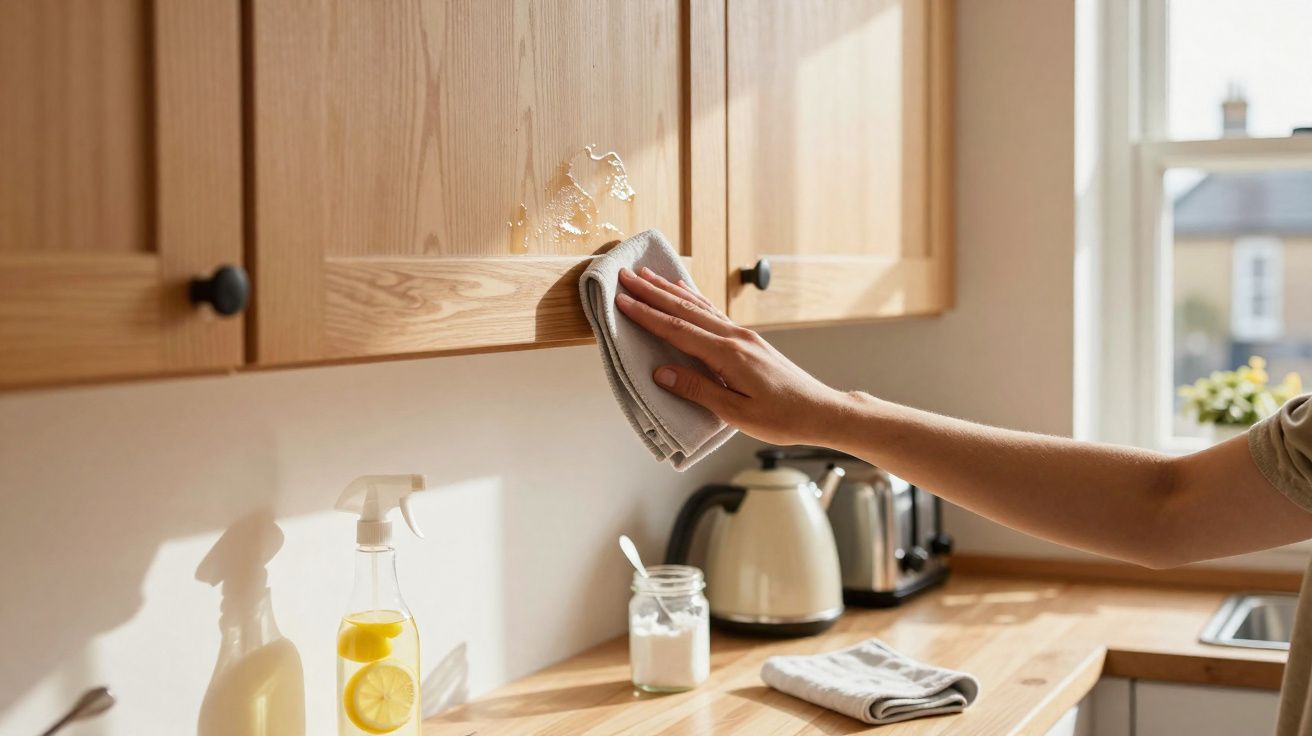
Wood: clean, protect, respect the grain
Wood doesn’t cope well with soaking, so keep moisture to a minimum and dry promptly. Dissolve a little Marseille soap in warm water, wet a microfibre, then wring it out thoroughly. Clean in small sections, always wiping with the grain, then immediately follow with a dry cloth to remove residue and moisture.
For older marks, make a soft paste of bicarbonate of soda and water. Dab it onto the spot, leave it for a few minutes, then lift gently - don’t grind it in. Always test a hidden area first. Once the surface looks revived, feed it occasionally with a very thin coat of linseed oil or a dedicated interior wood oil, wiping away every trace of excess so the wood feels protected rather than tacky.
Lacquered or high-gloss: sparkle without micro-scratches
Gloss surfaces show tiny imperfections, so keep cloths free of grit and avoid anything abrasive. Mix equal parts warm water and white vinegar. Lightly mist the cloth (not the door), wipe with minimal pressure, then follow with a clean damp cloth and dry to a streak-free finish.
For stubborn patches, a little washing-up liquid helps. You can also let vinegar fizz briefly on contact with bicarbonate of soda (just a few seconds), then wipe, rinse gently, and dry. If anyone suggests coffee grounds for “mild abrasion”, only try it on a hidden test area and use almost no pressure - even mild abrasives can dull high-gloss lacquer.
| Surface | Go-to solution | Contact time | Avoid |
|---|---|---|---|
| Stainless steel | Warm water + washing-up liquid, then lemon + a drop of oil | 30–60 seconds per section | Bleach, chloride cleaners, scouring pads |
| Wood | Very well-wrung microfibre + Marseille soap; optional thin wood oil | Keep it short; wipe and dry immediately | Soaking, strong alkalis, heavy abrasion |
| High-gloss lacquer | Half water, half white vinegar; gentle wipe and dry | 30 seconds, then rinse and dry | Abrasive powders, gritty sponges, direct spraying |
Safety and a routine that actually lasts
Start with a patch test. Finishes vary, and older kitchens can react unpredictably - choose an inconspicuous spot and check for dulling, lifting, or changes in sheen.
Work methodically: 1. Dust first. 2. Apply your cleaner and give it brief contact time. 3. Wipe using a clean side of the cloth. 4. Rinse if needed. 5. Dry thoroughly until the surface squeaks - this is what prevents halos and brings back that “new” look quickly.
Never mix vinegar with bleach or other chlorinated products. Wear gloves if your skin dries easily, and crack a window so the vinegar smell clears quickly.
A simple schedule: - Two-minute daily: warm microfibre + a drop of washing-up liquid on cupboard doors near the hob and on handles; dry straight after. - Weekly: light degrease on fronts facing the cooker; clean handles and edges; check plinths and end panels. - Monthly: wash extractor hood filters; wipe the tops of units where greasy film settles unnoticed.
When grease has aged
Put the scrubber away. Time and warmth are your friends. Place a hot, well-wrung microfibre over the affected area for a few minutes to soften the film.
Then match the cleaner to the material. Let it sit briefly, and make several light passes rather than one hard rub. Swap or refold your cloth the moment it starts to drag, then repeat. Consistent gentleness beats pressure every time.
Finish with careful drying: on brushed stainless steel, do your final buff with the grain; on wood, make sure no damp remains in joints or detailed grooves.
If a mark won’t shift after three gentle rounds, pause and reassess. It may be finish damage rather than dirt.
What a minimalist cleaning kit looks like
You don’t need a cupboard full of sprays. Keep a small caddy nearby so you’ll actually use it.
- Two good microfibres: one for washing, one for drying
- White vinegar and Marseille soap
- Washing-up liquid and bicarbonate of soda
- A soft brush for handles and profile edges
- Optional: linseed oil or interior wood oil; a small bottle of lemon juice
Why this approach pays off
Milder cleaners help preserve coatings and can delay costly refacing. Microfibres lift oil mechanically, so you use less product and less water. Quick daily wipes stop build-up, making the weekly clean lighter - which saves time, energy, and a lot of frustration.
If you rent, gentler products also reduce the risk of disputes over damage. If you have children or pets, low-fume routines keep the air calmer. And in hard-water areas, drying promptly prevents chalky spots from setting.
Extra context for UK homes (and UK kitchens)
Check manufacturer care sheets for pH recommendations on premium lacquer and matt finishes. Some coatings prefer neutral cleaners, and alcohol can haze certain soft-touch doors. If your kitchen is under warranty, sticking to approved products can save you problems later.
The time maths is persuasive: a two-minute daily routine adds up to about 14 minutes a week. Skip it for a month, and you can be looking at a 60–90 minute degrease - with a higher risk of harming finishes. Over a year, “short and gentle” wins comfortably.
One more note on risk: abrasive powders and green scourers create micro-scratches that hold onto grease next time. The surface dulls, and each clean gets harder. Break that cycle by keeping cloths clean, rotating them often, and retiring any that feel rough.
If a door feels sticky after cleaning, it’s usually overuse of product or leftover residue. Rinse with warm water, dry thoroughly, and use less next time. Aim for clean and dry - not perfumed and wet. That’s the quiet trick that keeps cupboards looking fresh even when late-afternoon sun hits every fingerprint.


Comments
No comments yet. Be the first to comment!
Leave a Comment